Simple View
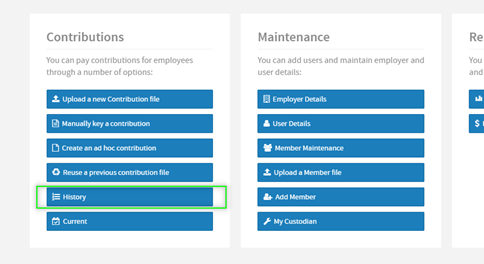
From the dashboard, click on History.

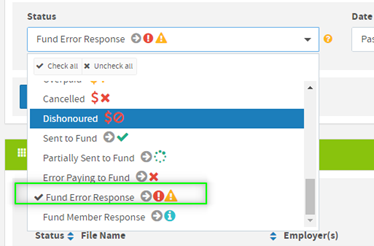
Click on the Status drop down list and select Uncheck All.
Then, scroll down and click on Fund Error Response to select it.

Make sure that the date filter is set to an appropriate period and then click Apply Filter.
All the submissions that match your selected criteria will then be displayed.
The total refund amount for each submission is visible in the Refunded $ column and the total number of refunds for each submission are visible in the “Issues” column.

To view the members affected, click on either the filename or the GRID icon to open the submission.

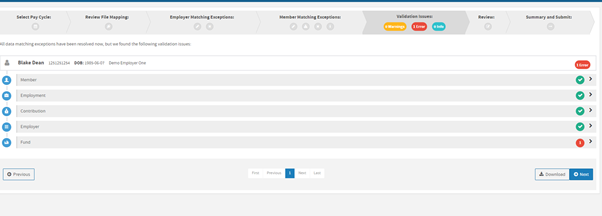
The validation screen will then display each affected member.

Click on the section with the red error icon. Then, hover over the highlighted field to see the reason for the refund.

You can download a report of all the affected members with the Download button at the bottom of the screen.
Additional information
Go to your Portal Dashboard and click on the little bell icon to access Notifications.

If a number of Errors are displayed, click on the “Error” button. This will display a screen with a range of pre-populated message filters.

Select the red button appearing under the column header No. of Contributions.

This will display all contribution records including the member details of the refund and the $ amount.

Click on the name of the member you want to review. An explanation will be displayed as to why the refund occurred.
You can download the record by clicking on the Download icon on the far right of the record line.
Note: On any day that you receive a refund, the Portal will email you to advise this has occurred.
Comments
0 comments
Please sign in to leave a comment.